How to Add Links to Your Instagram Stories?

How to Add Links to Your Instagram Stories?


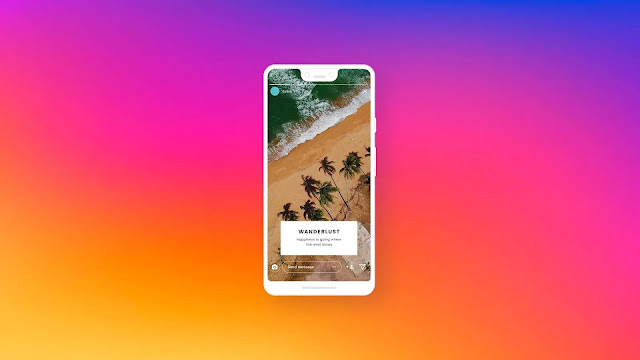
Instagram is a popular social platform for sharing links about work or some articles and stories worth mentioning. Influencers and creators also often use links to ask their followers to go and visit their work online, promote other brands, or advertise products. Earlier, Instagram offered the ‘Swipe Up’ option for adding links to Instagram Stories but it was recently replaced with Instagram Stickers. This new feature enabled users to add links anywhere in the Instagram Story. It ‘s no longer limited to just the bottom of the page.  

How to add links to Instagram Stories

Not all users on Instagram are allowed to add links to their Instagram Stories. Only those who have more than 10,000 followers on the social media platform, or have a verified account, or represent an established brand are allowed to add links to the Instagram Stories. These ceiling limits have presumably been enforced by Instagram to prevent misinformation and the spread of wrongful links on the platform. If you fall under the above-mentioned purview for access to the link button, here are the simple steps you need to follow to add a link to your Instagram Story. It is important to reiterate that users must practice caution when sharing links with their audiences. Check on the link’s authenticity and ensure that it is not a phishing or a spam link.

  1. Open Instagram on your phone and swipe left to upload an Instagram Story.
  2. Add your photo or video and edit it based on your preferences.
  3. Swipe up to open the editing tray and a Link option (a chain icon) should show up right next to Poll.
  4. Click on it and paste the URL you want to share with your followers.
  5. A portion of the link will show up in the sticker on your story to make followers aware of it before clicking.
  6. You can move the sticker to any part of the Instagram Story.
  7. Share your story by clicking on the Share to option and make it live. The link will be clickable for all the people who view your Instagram Story.

How to Find Lost iPhone, iPad, iPod touch, Mac, Apple Watch Using Siri?

How to Find Lost iPhone, iPad, iPod touch, Mac, Apple Watch Using Siri?

 Losing a device can be troublesome, especially if it’s a smart device like a smartphone, a tablet, a smartwatch, a laptop, or a music player. Apple helps users find their iPhone, iPad, iPod touch, Mac, or Apple Watch using its Find My feature. However, users can also find their Apple devices using the embedded voice assistant — Siri. However, the lost device must be connected to the Internet for Siri to locate the device instantly. Otherwise, the lost device will only receive the notification once it is connected to the Internet again.

Apple has shared a handy guide on its support page that helps users find their lost iPhone, iPad, iPod touch, Mac, and Apple Watch devices. It is also worth noting that finding any device using Siri would require users to link their devices to their iCloud accounts for the functionality to work seamlessly.

How to find your lost iPhone, iPad, iPod touch, Mac or Apple Watch using Siri

Finding a lost device using Siri is fairly easy, however, users need to note that they can only be found instantly if the lost device is connected to the Internet using Wi-Fi or cellular data. The following guide is for devices running iOS 14.

  1. Summon Siri either by the voice command “Hey Siri” or pressing the home button, side button, or the top button.
  2. Ask Find My ‘X’ (replace the ‘X’ with the lost device’s name such as iPhone or Apple Watch).
  3. Siri will then show the location of the linked Devices on the map in the Find My app.
  4. Additionally, Siri will also play a beeping sound on the lost device to make it easier to locate.

If the lost device is offline, Siri will send a command regardless and the notification will be sent to that device once it is back online. However, it is advised that users should register an FIR about the lost device at their nearest police station if they believe that their devices are lost and can’t be found easily.

How to Permanently Hide Chats in WhatsApp?

How to Permanently Hide Chats in WhatsApp?

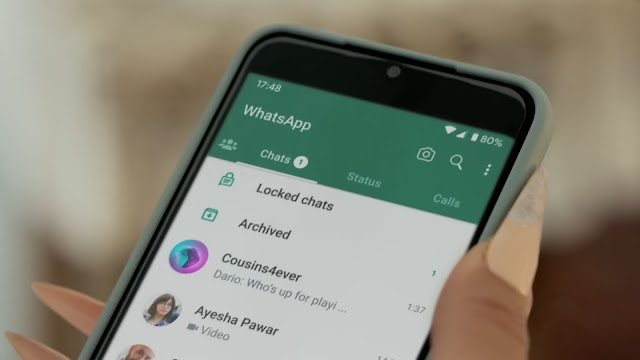
 WhatsApp now allows you to permanently hide chats by archiving them, even if new messages come in that conversation. This feature from the Facebook-owned messaging company is a great way of shutting off unwanted conversations, and keeping them from showing up in your main list of chats. The Archive folder essentially allows users to ignore a group or person without having to block them.

Up until very recently, WhatsApp allowed users to Archive chats that kept them hidden until a new message comes on the group, which then automatically unarchived it. In July, WhatsApp announced the rollout of its new Archived Chats settings that will allow users to keep their archived chats muted even when they receive a new message in an archived message thread. This means that all your archived chats will stay tucked away permanently unless you choose to manually unarchive them.

How to permanently hide chats on WhatsApp

The new Archived settings allow users to archive less important conversations keeping them hidden on the main chat list. Users will not receive notifications for archived chats unless you are mentioned or replied to. Both individual and group chats can be archived, and this can be accesses any time in the Archived section. To hide chats, follow the simple steps below:

  1. Open WhatsApp, select the chat that you want to archive. It can be a group or an individual chat.
  2. Three options will appear on top. Pin, Mute, and Archive (downward arrow facing icon). Click on the Archive button.
  3. The Archived section will show up on the top of your chat feed. You can go into the section and see your hidden chats at any time. Users can easily unarchive the chat by selecting the chat and clicking on the Unarchive option (upward arrow facing icon) on top.
  4. If you want to archive all chats, go to the chats tab and tap on More > Settings. Tap on Chats > Chat History > Archive all chats.

How to Recover Deleted Files From Google Drive?

How to Recover Deleted Files From Google Drive?


Google Drive stocks and organises your content in the cloud to access it at any time. If a user has deleted any file from Google Drive by mistake, there are methods to recover it from the trash folder. The file will stay in the trash folder for 30 days before being automatically deleted. If you remove a shared file from Google Drive, others can view it until you permanently delete the file. Once the file is out of trash, there is no way to recover it again.

For those unaware, Google offers 15GB of storage for free in the cloud, after which users need to buy paid storage through Google One plans. The Basic plan offers 100GB cloud storage for Rs. 130 per month. There is also a Standard plan that offers 200GB of storage for Rs. 210 per month and a Premium plan offers 2TB cloud storage for Rs. 650 per month. These Google One memberships support family sharing as well.

How to recover deleted files from Google Drive

Users can recover files on Google Drive using an Android phone, iPhone, iPad, or the desktop browser. The steps for all the three platforms are more or less similar. As mentioned, deleted files are kept in the trash folder for a month before getting permanently erased. If you change your mind about deleting a particular file, you can restore it easily from trash within 30 days of deleting it. Also, it is worth noting that you can only restore a file if you are the owner of the file. If you’re not the owner of the file, you will need to contact the owner to have them restore it. Follow the steps mentioned below to recover deleted files from Google Drive.

  1. Go to the Google Drive app on mobile, click on Trash.
  2. On a computer browser, go to drive.google.com/drive/trash.
  3. You can sort your trashed files by trashed date to find the oldest or newest files trashed.
  4. Click on the three dots icon below the file you want to recover or right-click the file you’d like to recover.
  5. Click on Restore.
  6. Your file should be restored into the same place it was removed from.

How To Make Your Own Logo?

How To Make Your Own Logo?


There are a number of things to consider when you want to create your own logo, such as Use of color, typefaces used and even a general shape or layout of the logo. We want something that will be recognizable and have bold colors. Our logo is for a real estate company named, Homes for Sale. Let’s get started.

1. Create new Document

We will start with a new document and because we are creating a logo, at this point, page size is not really important. It is a vector file that we are creating and so it can be resized at anytime, to the desired size. From the New Document dialog box (File > New), set the preset destination to Default RGB. We can leave the rendering intent at 300 and click OK.

2. Create the text elements

The main element in this logo is the number “4”. Select the text tool from the toolbox. Left click on the page and type the number “4” From the Interactive Property bar, change the font to Arial MT Black 1000 pt. We will also type the text “SALE” and set it to Arial MT Black 260 pt. In order to remove the center opening in the “4”, select the text with the text tool and goto (Object>Convert to Curves or Ctrl+Q). Next we will need to break it apart. (Objects>Break Curve Apart or Ctrl+K). The centerpiece of the “4” will be behind the larger piece. Hold the Alt key down while clicking in the center area of the “4”. This will dig down and select the object behind. Delete it. Once my text elements are complete, I will position them.

Create the text elements

3. Importing Clipart

The final step here with our logo would be to import the clipart image that we want to use. This clipart image is from the Vector Stock collection available on the Get More tab in CorelDRAW.

Importing Clipart

4. Using Spot colors

Typically when you create a logo, it should be done using spot colors. A spot color is a special premixed ink that is used instead of, or in addition to, process inks. Use a spot color when a few colors are required and color accuracy is important. In this logo we are using PANTONE 108C and PANTONE Black 6C. To change a color from RGB or CMYK to a spot color, with the object selected, double click on the fill swatch in the Status bar. In the Edit Fill dialog click on the Palettes tab and then select the Palette drop down list and locate Pantone Solid coated. This will automatically change the selected object to a spot fill. Repeat this process for the other objects.

Because the logo that you have created is a vector, it can be resized to whatever size you like, whether it is for a business card, a brochure or a large sign on a storefront.

Using Spot colors

How to Permanently Hide Chats in WhatsApp?

How to Permanently Hide Chats in WhatsApp?

WhatsApp now allows you to permanently hide chats by archiving them, even if new messages come in that conversation. This feature from the Facebook-owned messaging company is a great way of shutting off unwanted conversations, and keeping them from showing up in your main list of chats. The Archive folder essentially allows users to ignore a group or person without having to block them.

Up until very recently, WhatsApp allowed users to Archive chats that kept them hidden until a new message comes on the group, which then automatically unarchived it. In July, WhatsApp announced the rollout of its new Archived Chats settings that will allow users to keep their archived chats muted even when they receive a new message in an archived message thread. This means that all your archived chats will stay tucked away permanently unless you choose to manually unarchive them.

The new Archived settings allow users to archive less important conversations keeping them hidden on the main chat list. Users will not receive notifications for archived chats unless you are mentioned or replied to. Both individual and group chats can be archived, and this can be accesses any time in the Archived section. To hide chats, follow the simple steps below:

  1. Open WhatsApp, select the chat that you want to archive. It can be a group or an individual chat.
  2. Three options will appear on top. Pin, Mute, and Archive (downward arrow facing icon). Click on the Archive button.
  3. The Archived section will show up on the top of your chat feed. You can go into the section and see your hidden chats at any time. Users can easily unarchive the chat by selecting the chat and clicking on the Unarchive option (upward arrow facing icon) on top.
  4. If you want to archive all chats, go to the chats tab and tap on More > Settings. Tap on Chats > Chat History > Archive all chats.

How to Block Unknown Numbers on Android Phones?

How to Block Unknown Numbers on Android Phones?


 Looking for information on how to block unknown numbers on an Android phone? Google by default provides the option to block unknown numbers on Android. However, since the Android world is of a heterogeneous nature, there’s no one way of blocking unknown numbers on phones from different manufacturers. Different skins and interfaces have distinct ways through which you can block unknown numbers on your phone. Having said that, this guide will help you get rid of unwanted callers to some extent.

In this article, we detail the steps you can take to block an unknown number on your Android phone. We are beginning with the steps you can take if you have a Google Pixel phone or a handset with the Google Phone app installed. It comes pre-installed on phones including the OnePlus Nord 2 5G and various Nokia smartphones. You can also download the Google Phone app on your Android device from Google Play.

You have also been provided with ways to block unknown numbers on a Samsung phone and a Xiaomi model later in this article.

How to block unknown numbers on an Android phone with Google Phone app

Here are the steps that you can take to block unknown numbers on an Android phone that has the Google Phone app installed. Scroll down to the next section to look at the steps you can take if you have a Samsung phone.

  1. Open the Phone app.
  2. Tap the three-dot button from the top-right side of the dialler search bar.
  3. Now, tap Settings and then Blocked numbers.
  4. Turn on the Unknown option.

It is important to note that the term “unknown” on Android is not meant for the numbers that are not saved in your contacts. This is in contrast with that of the iPhone, and is meant specifically for calls that surface on you caller ID as ‘private’ or ‘unknown’.

How to block unknown numbers on Android phone from Samsung

Below are the steps you can take to block unknown numbers on a Samsung Android phone.

  1. Open the Phone app.
  2. Tap the three-dot menu and then select Settings.
  3. Now, tap Block numbers.
  4. Hit Block unknown/ hidden numbers to block private and unknown numbers on your phone.

How to block unknown numbers on Android phone from Xiaomi

Follow the steps available below to block unknown numbers on an Android phone from Xiaomi. We considered a phone based on MIUI 12.5 to detail the steps. However, there might be some changes if you have a different MIUI version on your device.

How To Record a Script in CorelDRAW?

How To Record a Script in CorelDRAW?

  From time to time you may need to batch process some images. While batch processing, you can also run scripts on the images. This can be anything from automatically adjusting, applying an effect or resizing. Being able to batch process is a great way to save time.

(toc)

For this guide we’ll be using Corel PHOTO-PAINT, included in the CorelDRAW Graphics Suite.

1. Open an image

From File > Open this will allow you to open an image that you can apply an effect on, or resize. These actions can be recorded and it will allow you to save this recording as a script.

Open an image

2. Open the Recorder

From Windows > Dockers > Recorder this will open the recorder and now it is just a matter of performing the tasks that you wish to capture.

Open the Recorder

3. Create the Recording

For this script we want to use it to bulk resize image by 50%. Click the red record button at the bottom of the docker. From this point forward, anything that you do in PHOTO-PAINT will be recorded. Next Image > Resample. For the Width change the 100% to 50% and click OK.

On the Recorder docker, click the Stop button at the bottom and then click on the Save icon at the top of the docker. Give it a file name such as 50% and click Save.

Create the Recording

4. Next Steps

Now that you have resized your images, you can upload them to Facebook or other social media sites. The smaller file size will decrease the upload times.

How to Update Aadhaar Card Details Online for Free?

How to Update Aadhaar Card Details Online for Free?


  Aadhaar card — the 12-digit identification number that is unique to every enrolled resident in India — can be updated online for free for the next three months, the Unique Identification Authority of India (UIDAI) recently announced. The process of updating Aadhaar documents online, which costs Rs. 50 at physical Aadhaar centres, involves uploading Proof of Identity (PoI) and Proof of Address (PoA) documents in order to revalidate a user’s demographic details, especially if their Aadhaar card was issued a decade ago.

It is worth noting that while the UIDAI says that updating demographic details online will aid in “improved ease of living, better service delivery and enhances authentication success rate”, the process of updating demographic details is not compulsory.

Updating Aadhaar details online is a straightforward process that can be completed within a few minutes. Users will require scanned copies of original PoI and PoA documents, depending on the demographic information that needs to be updated. While making these changes costs Rs. 50 at physical centres, it can be done at no cost until June 14, according to the UIDAI.

You can follow the guide below to update your Aadhaar card details online for free before June 14.

How to update Aadhaar demographic details online:

  1. Visit the Aadhaar Self Service Portal on the UIDAI website.
  2. Log on to the portal by entering your Aadhaar number followed by an OTP.
  3. Click on Document Update and check and verify the existing details.
  4. Using the drop-down list, select and then upload scanned copies of original documents for verification.
  5. Note the service request number, to keep track of the process of updating your details.

How to Make UPI Payments Without an Internet Connection?

How to Make UPI Payments Without an Internet Connection?

   Has this ever happened to you that you are in the middle of sending money online using Google Pay, Paytm, PhonePe, or any other UPI payment service, and your Internet connection stops working for some reason? If yes, then *99#, a USSD (Unstructured Supplementary Service Data) based mobile banking service, can be really helpful to you. It lets you request and send money, change UPI PIN, and even check account balance without an internet connection.

The *99# service brings banking services to everyone across the country. It is offered by 83 leading banks and 4 telecom service providers and can be accessed in 13 different languages including Hindi and English. Here’s how you can set it up and make offline UPI payments.

Set up offline UPI payments

  1. Dial *99# on your smartphone or feature phone. But, make sure you are using the same phone number to make this call that has been linked to your bank account otherwise this service won’t work.
  2. Then, choose your desired language and enter your bank name.
  3. You will be shown a list of bank accounts that are linked to your number, so choose the one that you want to use by pressing the correct option.
  4. Now, enter the last 6 digits of your debit card alongside the expiry date.
  5. Once you have successfully set it up, you can make UPI payments without an Internet connection, as explained in the next steps.

Make offline UPI payments

  1. Dial *99# on your phone and enter 1 to send money.
  2. Choose your desired option and enter the UPI ID/ phone number/ bank account number of the person you want to send money to.
  3. Then, enter the amount and your UPI PIN.
  4. Once done, your payment will be successfully made, and you will be charged a maximum of Rs. 0.50 per transaction for using the *99# service.

Currently, the upper limit on this service is Rs. 5,000 per transaction. Do try this out and let us know in the comments if this was useful.