How to Turn Zoom Audio Notifications On/ Off?


How to Turn Zoom Audio Notifications On/ Off?

Zoom has a popular audio notification feature that tells you when a participant joins or leaves a meeting. This is particularly useful when you’re waiting for someone, but it can be irritating when you’re part of a large conference meeting or event and you constantly hear notifications as people come and go. The audio notification has a doorbell-like sound to give you the feeling of a real person ringing the bell behind a real door. And just like your house doorbell, there is way to turn the audio notifications off for your virtual Zoom meeting rooms.

The audio notification option on Zoom also comes with several customisations like choosing to play the sound for everyone or restrict it to hosts and co-hosts. There is also an option to ask to record a user’s voice to use as notification when someone joins by phone

How to turn Zoom audio notifications on/off

Users on a Zoom call can easily toggle audio notifications based on what they prefer. This can be done before a call commences, or even during the meeting. If you turn the audio notifications off, you will not get an audio prompt every time a user leaves or enters a Zoom meeting. This feature is important for users who are waiting on someone and are doing other chores in the meantime. The audio tune serves as an alert that someone has entered the Zoom call, especially useful when you’re not looking at the screen. Follow the steps below to turn off /on the audio notifications on Zoom.

  1. If you’re logged into your Zoom account from the Web browser, click on Settings option placed in the left-hand column. If you’re on the Zoom app, click on your profile icon > select Settings View More Settings.
  2. In Settings, click on In Meeting (Basic) in the left column and scroll down. Search for an option called ‘Sound Notification When Someone Joins or Leaves’. Toggle this feature on or off as per your preference.
  3. If you toggle it on, you can choose from three options. The first one lets you play the sound for everyone, the second only for hosts and co-hosts, and the last one lets you record a user’s voice as a notification, which is only for users who join by the phone.

How to Configure and Mute Threads Notifications on Android phone?

How to Configure and Mute Threads Notifications on Android phone?


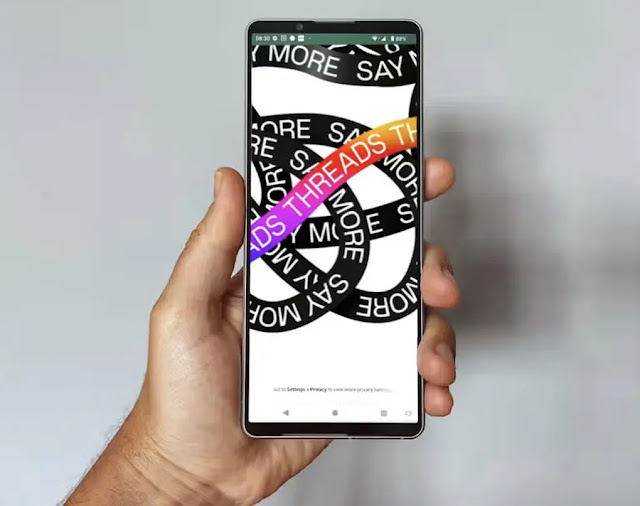
Threads, the Twitter rival by Meta, went live on Thursday and the new microblogging platform has already racked up more than 50 million sign-ups just over a day after it was launched by the Facebook parent firm. You can log on to Threads with your Instagram credentials and the app will alert you every time one of your Instagram contacts follows you back. Also, you will be alerted when your posts on Threads receive likes, replies, reposts, and mentions. These constant notifications can get tiresome — but there are a few ways to manage them to ensure a better experience on the new app.

Meta’s new Twitter rival uses Instagram’s account system and you can keep your username, followers and verification status on Threads. It can be accessed from the desktop site at Threads.net or by downloading the app on iOS and Android smartphones.

threads screenshots threads instagram

Threads notification settings on Android


At present, the app sends out 10 different types of notifications for likes, replies, mentions, reposts, quotes, first threads, new followers, follow request acceptance, account suggestions and pre-followed user joined Threads.

How to manage Threads notifications on Android

You can remove notifications from Threads that spam you with too many messages or aren’t useful anymore by following these steps on Android:

  1. Head over to your profile page on Threads and tap the Menu button at the top-right corner. 
  2. Tap on Notifications.
  3. Tap Pause all or make singular adjustments in Threads and replies or Following and followers. You can choose from five options — 15 minutes, 1 hour, 2 hours, 4 hours, 8 hours to mute notifications.
  4. Under Threads and replies you can pick from three options: everyone, people you follow or turn it off completely.
  5. Under Following and followers, you can either turn off every single notification or turn it on.

The steps outlined come in handy when you’d like to use Threads but don’t want to constantly receive ongoing notifications from the app. Threads currently allows you to post up to 500 characters on the app with links, photos, and videos. These can be cross-posted to your Instagram story as well. Like Instagram, the new app also lets to set the profile as “Private”. The new platform is expected to add new features in the coming days.

How to Turn Off Read Receipts in Facebook Messenger, Apple iMessage, WhatsApp?

How to Turn Off Read Receipts in Facebook Messenger, Apple iMessage, WhatsApp?

 WhatsApp, Facebook Messenger, and Apple’s iMessage — all three apps have the read receipt function that notifies the sender when the receiver has read their message. Read receipts are an important part of communication through messaging apps. It allows users to understand whether their message has been seen by the recipient or not. 

WhatsApp, Facebook Messenger, and iMessage support the read receipt function by has different ways of notifying the sender that their message has been read. But if you like to keep things more private and not allow the sender the freedom to know when you have read their message, you can turn these read receipts off at any time. For instance, if you keep your read receipts on WhatsApp a blue tick appears next to the message when the recipient has read it.

We’ve compiled a step by step guide on how to turn off read receipts on apps like WhatsApp, Facebook Messenger, and Apple’s iMessage.

How to turn off read receipts in WhatsApp

In order to close read receipts on your WhatsApp, follow these steps.

  1. Open the WhatsApp app. Click on the three dots icon on the top-right corner of the screen. Click on Settings.
  2. Once in Settings, click on Account > Privacy.
  3. An option called Read Receipt can be found here. Toggle it off to disable it in individual chats. You cannot disable read receipts for group chats.

How to turn off read receipts in iMessage

Turning off read receipts on iMessage requires a few more steps than WhatsApp.

  1. Head to the iMessage app on your iOS device.
  2. Go to Settings and tap on Messages.
  3. An option called Send Read Receipts can be found here. Toggle it off to disable the ability completely.
  4. If you want to disable read receipts for specific chats, head to that user’s chat and click on the user’s profile pic.
  5. Select Info icon and toggle off Send Read Receipt option.

How to turn off read receipts on Facebook Messenger

In Facebook Messenger, unfortunately, there is no option to disable read receipts. There is an option in settings called Active On, which helps in disabling the Active Now banner attached to your name every time you come online. It also shows the last time you were online, and toggling this off will not let your friends see that information. This can be found by going in the Messenger app > clicking on the profile icon > From Active ‘On’ > Toggle it ‘Off’. However, there is also a workaround for reading a message without letting the sender know.

  1. After you receive a new message on Facebook Messenger, just turn on Airplane Mode from your phone’s Settings, which will disable Internet and network connections on the device.
  2. You can then open Messenger and view the message without an Internet connection.
  3. After you finish reading, close the app, and swipe it out of your app drawer.
  4. You can now turn off Airplane mode. This way the sender will not be notified that you have read their message till you open the app again.

Dual WhatsApp: How to Use Two Whatsapp Accounts on One Android Phone?

Dual WhatsApp: How to Use Two Whatsapp Accounts on One Android Phone?


WhatsApp can be used with two different accounts on the same phone. The instant messaging app is among the most popular apps in the world. It allows you to message or call another WhatsApp user no matter where they are in the world, as long as they have an internet connection. 

The Facebook-owned app is free to download for Android and Apple users and can be used on mobile phones or desktops. However, there are some limitations to the app, such as only WhatsApp account can be used per phone number. However, most manufacturers allow users to set two versions of the same app on their Android smartphones,

Manufacturers including Xiaomi, Samsung, Vivo, Oppo, Huawei, Honor, OnePlus, and Realme allow its users to set up dual apps or parallel apps or twin apps. They use different terminologies for what is essentially a feature that allows users to have two separate versions of the same app, thus allowing for two different apps. Read on to find out how you can enable this feature on different phones.

Xiaomi phone users running MIUI can head to Settings > Apps > Dual apps. Samsung phone users can head to Settings > Advance features > Dual Messenger. Vivo users can go to Settings > Apps and notifications > App Clone. Oppo phone users can tap on Settings > App Cloner. Huawei and Honor phone users can go to Settings > Apps > App twin. OnePlus lets its users clone apps by heading to Settings > Utilities > Parallel Apps. Finally, Realme users can go to Settings > App management > App cloner.

Now, here’s how you can use two WhatsApp accounts on one Android smartphone.

How to use dual WhatsApp on one smartphone

  1. To enable a second account on WhatsApp, head to Settings.
  2. Look for Dual apps, App Clone, App twin, or Parallel Apps. The name of the feature would depend on the smartphone you are using.
  3. There should be a toggle against WhatsApp app, turn it on.
  4. Wait for the process to complete and head back to the home screen.
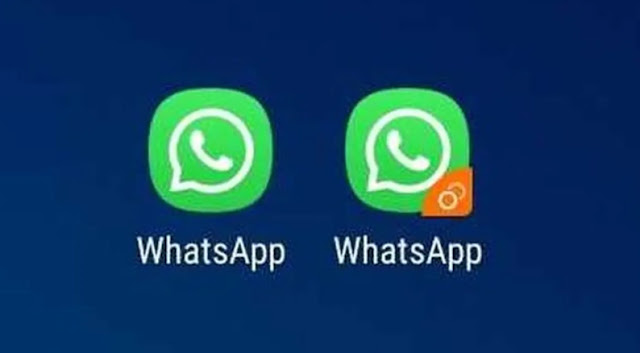
  5. You should see a second WhatsApp icon with some kind of marking on it, identifying it’s a second version of the same app.
  6. Open it and you will be greeted with the WhatsApp setup screen.
  7. Tap on Agree and Continue.
  8. On the next screen, enter a different phone number from the one you’ve already used to set up WhatsApp and tap on Next.
  9. You will then receive an OTP for verification.
  10. After entering the OTP, you will be asked to complete the setup process after which a second WhatsApp account will be set up.

You now have two WhatsApp accounts on the same smartphone.

How to Play YouTube Video in Picture-in-Picture Mode on iOS?

How to Play YouTube Video in Picture-in-Picture Mode on iOS?

iPhone or iPad users can enjoy YouTube videos in picture-in-picture mode, just like Android devices. You don’t need to have the YouTube app installed on your iPhone or iPad to get the picture-in-picture mode. Instead, you can experience it directly using a Web browser, including the preloaded Safari. The picture-in-picture (PiP) mode is essentially quite useful if you want to do some multitasking on your iPhone or iPad. You can easily access your settings menu or check for a message on WhatsApp.

Apple has enabled picture-in-picture support natively since the release of iOS 14/ iPadOS 14 last year. It can be used to watch YouTube videos in picture-in-picture mode on your Apple device. Here’s how it’s possible.

How to run YouTube videos in picture-in-picture mode on iOS

Before beginning with the steps you can take to run YouTube videos in picture-in-picture mode on iOS, it is important to note that you must be a YouTube Premium member and sign in with the account that has that paid subscription. The feature also doesn’t work with the YouTube app at this moment. This means that you need to rely on a Web browser such as Safari or Chrome to run your favourite YouTube videos in picture-in-picture.

  1. Open your Web browser and log in to YouTube with your account that is a part of the YouTube Premium subscription.
  2. Search for a video that you want to watch.
  3. Switch to the full-screen mode by tapping the square icon from the bottom right of the video.
  4. Tap on the video to view controls and then press the picture-in-picture button from the top left side — just next to the close button. Alternatively, you can double tap on the screen with two fingers or simply swipe upwards from the bottom of your device to enable the picture-in-picture mode.
  5. Once enabled, picture-in-picture mode lets you move to and work on any other app you want to — while continuously playing running YouTube video in a small window.

You can exit the picture-in-picture mode by tapping its icon from the top-right side of the small window. It can also be moved back to the original view by double tapping on the video using two fingers. Once done, you can close your YouTube video by tapping on the ‘x’ button.

How to Transfer Contacts From Android to iPhone?

How to Transfer Contacts From Android to iPhone?


Switching from an Android phone to an iPhone can be a daunting experience. It’s a whole different ecosystem, one that is more exclusive and tightly wound. However, there are a few ways in which you can make the transition smoother when it comes to transferring data. While the two ecosystems are completely different, a Google account can be a common space that can help you in moving your data including contacts. And, there are other tools specifically designed for this as well. Read on to know how you can transfer contacts from Android to iPhone.

Android users can transfer their contacts over to an iPhone using a few different methods. They can do so using the Move to iOS app developed by Apple specifically to help you transfer your data. This app can be used when you are setting up your iPhone. Users can also make use of a common Google account, manually transfer contacts through a VCF file, or use the SIM card to transfer them to your iPhone.

How to transfer contacts from Android to iPhone using Move to iOS app

  1. Download Move to iOS app from the Google Play store on your Android phone.
  2. Open the app and tap on Continue.
  3. You will be greeted by Terms and Conditions. Tap on Agree.
  4. The app will then ask for location permission, access to contacts, calendar, storage, and SMS, all of which you will have to grant.
  5. On the Find Your Code screen, tap on Continue. You will then be asked to enter a code.
  6. Move over to your iPhone and during the setup process, you will see a Move Data from Android option. Tap on it.
  7. You will get a ten-digit or six-digit code. Enter this code into your Android phone.
  8. You should now see a Transfer Data screen that asks you to select the content you want to transfer. Select Contacts, along with whatever data you want to move over and tap Next.
  9. Leave both devices idle until the loading bar on your iPhone finishes.
  10. Once the loading bar completes, tap on Done on your Android phone and Continue on your iPhone to finish the setup process.

How to transfer contacts from Android to iPhone using Google account

  1. First make sure that your contacts are synced with your Google account. To do so, head to Settings on your Android phone. Also, make sure you have an active internet connection.
  2. Scroll down to Accounts and tap on your Google account.
  3. Tap on Account sync and either tap on the three dots menu to sync everything or switch the Contacts toggle to off and then on again to sync just the contacts.
  4. Move over to your iPhone and head to Settings.
  5. Tap on Mail and then tap on Accounts.
  6. Tap on Add Account and enter the same Google account as your Android phone. Make sure the Contacts toggle is turned on.
  7. You Android contacts should now be visible on your iPhone.

How to transfer contacts from Android to iPhone using VCF file method

  1. On your Android phone, head to the Contacts app.
  2. Tap on the gear icon or three dots menu to select the Import/ export option.
  3. You should see two options here, tap on Export to .vcf file. These options may differ on different Android phones.
  4. This will create a VCF file of your contacts in your phone’s storage.
  5. Send this file to your iPhone using either iTunes or simply by mailing it to yourself and using the same mail account on your iPhone to download it. There are a few different ways you can send a VCF file to your iPhone which you can refer to through this guide.
  6. Open the VCF file and you should see an option to Add all contacts. Tap on it.
  7. Your contacts should show on your iPhone.

How to transfer contacts from Android to iPhone using SIM card

  1. On your Android phone, head to Contacts app and tap on the gear icon or the three dots menu.
  2. Tap on SIM card contacts and if you have a dual-SIM phone, select the SIM card you will be using in your iPhone.
  3. Tap on the three dots menu and select Import from phone.
  4. You will be asked to choose which contacts you want to transfer to phone. You can use the select all option to transfer all contacts or select them individually. Then, tap on Done.
  5. When the process completes, remove the SIM card and insert it into your iPhone.
  6. On your iPhone, head to Settings and tap on Contacts.
  7. Tap on Import SIM Contacts and wait for the process to complete.
  8. Your contacts should now show on your iPhone.

How to Hide Photos in iPhone Without Using Third-Party App?

How to Hide Photos in iPhone Without Using Third-Party App?


Your iPhone may have photos that you do not want to delete right away, but for some (privacy) reason, you also do not want them to be shown in your Photo Library. You can hide any of those photos in your iPhone without requiring any third-party apps. Apple has natively provided the option to let you hide your photos in your iPhone. You can use that option to make sure your photos won’t be visible to your loved ones looking at your Photo Library.

For quite some time, Apple allowed users to hide photos from their Photo Library. But the hidden photos were a part of a ‘Hidden’ album that was still visible in the Albums section of the Photos app. That experience was updated with the release of iOS 14 last year.

The iOS 14 release allows you to completely hide photos in your iPhone, without using a third-party app. Here’s how you can do this.

How to hide photos in iPhone without using a third-party app

Before getting started with the steps on how you can hide photos in your iPhone without using a third-party app, make sure that your iPhone is running on at least iOS 14. It is also important to point out that the hidden album on iOS is enabled by default. But you can turn it off by taking the following steps. Also, you can follow the same steps to hide photos to hide your videos as well.

  1. Open Photos app on your iPhone.
  2. Select the photo or video you want to hide. You can also pick multiple photos or videos by tapping the Select button from the top-right corner of the screen.
  3. Tap the Share button and then select Hide from the menu.
  4. Confirm that you want to hide the selected photo(s) or video(s).
  5. Now, go to Settings and tap Photos.
  6. Scroll down and turn off the Hidden Album option.

You can follows steps 5 and 6 and turn on the Hidden Album option again to see the folder in the Photos app. It should be noted that any photos or videos you hide may appear on third-party apps. The given steps can also be followed on iPadOS to hide or unhide photos on an iPad.

How to Connect Apple AirPods to Android Phone?

How to Connect Apple AirPods to Android Phone?


Apple AirPods can be connected to Android phones. And even though Apple has designed the AirPods (and AirPods Pro) — just like all its products — to remain an integral part of its ecosystem, Android users have the option to connect the company’s true wireless stereo (TWS) earbuds with their phones. This is unlike the complete incompatibility that keeps Apple Watch from being used with Android devices. The ability to connect Apple AirPods with an Android phone also means that you don’t need to give up your existing handset for experiencing arguably the world’s most popular wireless earbuds — market stats from third-party research firms are a testament to its popularity.

AirPods are one of the few Apple devices that you can use without ditching your Android phone. Here’s how you can connect them with your Android device.

How to connect Apple AirPods to Android phone

Before getting started with the steps you can follow to connect Apple AirPods to your Android phone, it is important to mention that you will get a limited experience. You will not be able to view the battery status of the AirPods and its charging case by default from your Android phone. You will also not receive the extensive gesture support that Apple has provided for iOS users. Having said that, you can follow the steps below to start listening to music on the AirPods from your Android phone.

  1. Enable Bluetooth on your Android phone by going into Settings.
  2. Open the lid of the AirPods case and then press and hold the white button on its back until you see the status light flash white.
  3. Now, go to Settings > Connections > Bluetooth on your Android phone. You’ll see the AirPods appearing on the list of available devices. Since the Android ecosystem has heterogeneity, the Bluetooth settings might be available under Settings > Connected Devices or directly under the Settings menu — depending on which device you’re using and with which operating system/ custom skin is on top of it.
  4. Tap on the name of the AirPods you’re connecting with your phone to pair the two devices.

Once connected using the above steps, you can use the AirPods with your Android device just like you would use other TWS earbuds or Bluetooth headphones. This means that you will not be required to follow the same procedure each time you want to listen to music through the AirPods. Henceforth, you’ll see the AirPods in the list of paired devices on your phone.

How to Check an AirTag’s Battery Life and Replace Existing Battery?

How to Check an AirTag’s Battery Life and Replace Existing Battery?

 AirTag is claimed to deliver over a year’s worth of battery life with everyday use. But that doesn’t mean that Apple has not provided an option to keep an eye on your AirTag’s battery life. Your Apple device will alert you with a notification when your AirTag’s battery becomes low to let you arrange for its replacement. Additionally, there is an easy way to replace the existing battery of your AirTag. Apple’s AirTag carries a CR2032 battery that’s user-replaceable and widely available through online or offline stores near you.

But before buying a new battery for your AirTag, you should check the status of the existing one as the company claims to offer a fair amount of usage that should last you a year.

How to check AirTag’s battery life

Before beginning with the steps to check the battery life of your AirTag, it is important to note that the device must be connected to the Find My app. Your Apple device, which can be an iPhone, iPad, or a Mac, should also be connected to Wi-Fi or cellular Internet to provide accurate details. If these two conditions are fulfilled, you can proceed with the steps below.

  1. Open the Find My app on your Apple device.
  2. Go to the Items tab.
  3. Now, tap the name of your AirTag. You’ll see the battery status right after the AirTag’s name and location.

Apple doesn’t provide the option to look at the exact percentage of battery remaining on your AirTag. However, the battery status available through the Find My app is good enough to suggest when you will need its replacement.

How to replace AirTag’s battery

You can replace the battery of your AirTag in just a few steps. Before beginning with the replacement process, make sure you’ve removed the AirTag from the accessory or case it is attached to. 

  1. Hold the AirTag with its stainless steel battery cover facing towards you.
  2. Press down the cover and rotate it counter-clockwise until it stops rotating.
  3. Release your fingers. The battery cover will now pop up.
  4. Pull the cover and remove the battery, and then insert a new one with the positive side of the battery facing towards you.
  5. Once the battery is placed correctly, reattach the cover by lining up the three tabs on the cover with the slots available on your AirTag and press it down with a little pressure.
  6. The AirTag will now play a song to indicate the new battery is connected.
  7. Rotate the cover clockwise until it stops.

Keep the original battery away from children and dispose it off properly.

How to Check All Phone Numbers Registered Against Your Aadhaar?

How to Check All Phone Numbers Registered Against Your Aadhaar?

 Looking for a way to check all phone numbers registered against your Aadhaar card? It is possible through a portal launched by the Department of Telecommunication (DoT) that lets individuals check how many phone numbers are registered on their Aadhaar number. The portal is initially working for Andhra Pradesh and Telangana consumers. It is helpful essentially if you want to block any connections that no longer exist. The phone numbers that are registered against your Aadhaar number can also help you speed up the know-your-customer (KYC) process required by banks and various government authorities.

The DoT launched the Telecom Analytics for Fraud Management and Consumer Protection (TAFCOP) portal in April to allow telecom subscribers to search for all the phone numbers registered against their Aadhaar number. The portal is currently available only in Andhra Pradesh and Telangana, though the DoT mentioned that it would soon be extended to all consumers in the country.

According to the FAQ page, the TAFCOP portal is designed to “help subscribers, check the number of mobile connections working in their name, and take necessary action for regularising their additional mobile connections if any.”

The DoT has guidelines that permit registration of up to nine mobile connections for each single subscriber. After exceeding that count, every new connection purchased on the same name will be considered under a bulk connection that is meant for commercial purposes. You should, therefore, check the count from the TAFCOP portal. Here’s how it is possible.

How to check all phone numbers registered against your Aadhaar number

Below are the steps that you can take to check all phone numbers registered against your Aadhaar number.

  1. Go to the TAFCOP portal and enter your active mobile number.
  2. Click on the Request OTP button.
  3. Enter the OTP you have received on your phone and hit Validate.
  4. The TAFCOP portal will now show you the numbers associated with your Aadhaar number.

The portal also lets users report whether the numbers are not in use by themselves or are not required.