How to Check Airtel Number?


How to Check Airtel Number?

Airtel is one of the largest telecom operators, offering 5G services almost all over the country. So, naturally, you might have got a new Airtel SIM recently, and there is a high chance that you might forget the new number. 

However, there are different ways you can easily get to know your Airtel number. In this guide, we will talk about five different methods through which you can easily check your Airtel number. So, without wasting your time, let’s get straight away to these methods. 

Airtel Number Check via USSD Code 

Users can easily check the Airtel number by using the USSD code given by the company. USSD stands for Unstructured Supplementary Service Data. 

Usually, shortcodes are used by mobile networks to provide instant information to their customers. That said, here’s how you can easily use the Airtel USSD code to know your mobile number: 

Step 1: Open the Phone or Dialer application on your Android or iOS device. 

Step 2: Dial *121*1# or *282# from your registered Airtel mobile number. 

You will get a pop-up message that displays your Airtel number. Make sure you write it down on paper or a notepad so you Can Easily remember it for future reference. 

Airtel Number Check via Airtel Thanks App

Airtel has a dedicated application known as Airtel Thanks that provides a variety of services. The app is a one-stop solution for customers to know everything about the company’s services, apply for new requests, check balances, data, validity, and more. The application also showcases the mobile number as well. Here’s how you can check it: 

Step 1: Download and install the Airtel Thanks application on your Android or iOS device. 

Step 2: Open the application and register or sign in with your Airtel account. 

Step 3: At the top of the screen, you can check your Airtel number and other details, such as validity, account balance, data, and more. 

Airtel Number Check via Customer Care Support 

One can also check Airtel’s number by simply calling customer care support. This is also a convenient method of knowing the mobile number of your new Airtel SIM. Here’s how you can do it: 

Step 1: Open the Phone or Dialer app on your mobile. 

Step 2: Dial 121 or 198 from your registered Airtel mobile number. 

Step 3: Press 1 for mobile services. 

Step 4: With this, the IVR will inform you about your Airtel number alongside other details like mobile balance, data, and validity. 

Airtel Number Check by Calling Another Mobile

Calling a friend or family member is also one way to find your Airtel number. If you are with friends or relatives, just give them a call using your Airtel number. They will be able to see your mobile number, and you will learn your mobile number. 

Airtel Number Check via Setting Menu on Mobile

Lastly, we also have a way for you to check your Airtel mobile number easily. One can get this information from the iOS Settings menu. So, if you have an iPhone, here’s how you can know your Airtel number: 

Step 1: Open the Settings menu on your iPhone 

Step 2: Go to the Phone application. 

Step 3: Your registered Airtel mobile number is under the My Number section. 

How to Check Vi (Vodafone Idea) Number?

How to Check Vi (Vodafone Idea) Number?

 Vodafone Idea is one of the largest telecom operators in India after Airtel and Reliance Jio. However, it is still the only private telecom operator that has yet to roll out its 5G services in the country. That said, Vi offers some great recharge plans that surely attract many. So, you might have bought a new Vi prepaid or postpaid SIM to take advantage of these benefits. However, there will be times when you find it hard to remember your Vodafone Idea number. So, to help you out, we have come up with a detailed article in which we will talk about different ways to check your Vi mobile number. So, without further ado, let’s get started!

Vi Number Check via USSD Code

Vodafone Idea offers different ways to check Vi mobile numbers. However, one of the most convenient ways is to use the USSD (Unstructured Supplementary Service Data) codes. Here are some of the steps to find your Vodafone Idea number easily.

Step 1: Open the Phone or Dialer application on your Android or iOS device.

Step 2: Dial *199# from your registered Vodafone Idea mobile number.

Step 3: A flash message showing your Vi mobile number will appear on your smartphone.

Make sure you write it down on paper or a notepad so you Can Easily remember it for future reference.

Vi Number Check via Vi App

Vi also offers an application that allows users to track all the important information regarding their mobile numbers. However, it is important to note that one must first enter the mobile number to register your number to the application. So, you can follow the USSD code to know the number and then follow these steps:

Step 1: Download and install the Vi application on your Android or iOS device.

Step 2: Open the application and sign in by entering the Vi mobile number (you can use the above steps via USSD codes).

Step 3: Enter the OTP sent to your registered mobile number and log in to the application.

Step 4: At the top of the screen, you can check your Vi number and other details, such as validity, account balance, data, and more.

With this, you can open the application anytime to know your Vi mobile number with ease.

Vi Number Check via Customer Care Support

Users can also check their Vi number by simply calling customer care support. The customer care representative will help you to know your Vi mobile number. You can follow these steps to know your number:

Step 1: Open the Phone or Dialer app on your mobile.

Step 2: Dial 199 or 198 from your registered Vi mobile number.

Step 3: Select your preferred language.

Step 4: Follow the instructions to get your call connected to the customer care representative.

Once done, you can simply ask the executive about your Vi mobile number. However, you should note it down on your notepad or on your phone so that you can easily know it in the future.

Vi Number Check by Calling Another Mobile

You can also phone a friend or family member to find out your Vi number. If you are with friends or family, simply make a call on their number and they will tell you the Vi number. Alternatively, you can inform a friend or relative of your Vi number by sending them an SMS.

How to Delete Google Pay Transaction History?

How to Delete Google Pay Transaction History?


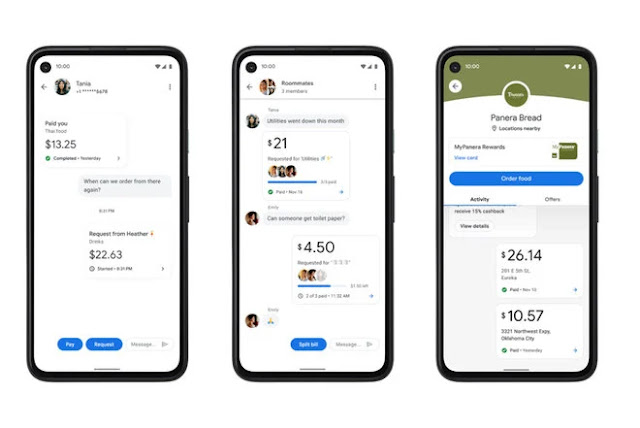
Google Pay is a popular payment solution in India that caters to millions of people. The UPI-based payment system provides contactless payments effortlessly. However, it also comes with a cost of privacy. Google Pay stores your transaction history. 

That said, the company also gives you an option to delete your Google Pay transactions history without much hassle. This guide lists different methods to easily delete your Google Pay transaction history using the Google Pay application or your laptop. So, without further ado, let’s get started.

How to Delete Google Pay Transaction History

Google allows you to delete any transaction history on its Google Pay application. Check out these two different methods:

Delete Google Pay Transaction History via Mobile App

One can easily delete Google Pay transaction history from the mobile application. Here’s how:

Step 1: Open the Google Pay application on your smartphone and tap on the Profile section.

Step 2: Scroll down, tap Settings, and then go to the Privacy & Security option.

Step 3: Tap on the Data & Personalization option and click the Google Account link that will take you to the Google Accounts page.

Step 4: Now, go to Payments & Subscriptions > Payment Info and tap on Manage Experience.

Step 5: Under Payments Transactions & Activity, you will find the list of Google Pay transactions.

Step 6: You can delete individual Google Pay transaction history by tapping the cross button next to the transaction.

Step 7: One can also delete the transaction history in bulk. Just above the transaction, you will find the Delete option.

Step 8: Select the desired time frame, and the data will be deleted from your Google Pay application.

Delete Google Pay Transaction History via Desktop

Google also gives you an option to delete your Google Pay transaction history from your desktop. Here’s how you can do it:

Step 1: Go to https://myaccount.google.com/ and click the Payments & Subscriptions option.

Step 2: Scroll down to find Payment Info and click the Payments Transactions & Activity option.

Step 3: You will find a list of Google Pay transactions. You either individually delete each transaction.

Step 4: One can also delete the transaction history in bulk by clicking the Delete option and selecting the time frame.

How to Export Your Google Pay Account Data?

Google also provides an option to easily export your Google Pay account data for your future use. This option is also viable for those who want to keep a backup before deleting the Google Pay transaction history. Here’s how you can do it:

Step 1: Go to your mobile or desktop browser and visit https://myaccount.google.com/.

Step 2: Under the Data & Privacy section, click ‘Download Your Data’.

Step 3: Now, select Google Pay from the list and tap on Next Step.

Step 4: Select the Transfer to option, Export Frequency, file type, and file size according to your preference and tap on Create Export.

Step 5: You can export all your Google Pay data from your account.

How to Permanently Delete a Google Pay Account?

You can permanently delete a Google Pay account if it is no longer required. Just follow these simple steps to do so.

Step 1: Go to https://myaccount.google.com/ from your mobile or desktop browser.

Step 2: Go to Data & Privacy and then scroll down to Delete a Google Service.

Step 3: You will see a list of services. Search for Google Pay service and click on the dustbin icon right next to it.

Step 4: You will get a warning message. Follow the on-screen instructions, and your Google Pay account will be deleted permanently.

How to Reopen Closed Tabs in Chrome, Safari, and Firefox


How to reopen tabs in Chrome

The keyboard shortcut

There are a couple ways to reopen tabs in Chrome. If you’re into keyboard shortcuts, the easiest way is to simply hit Command+Shift+T (on Mac) or Ctrl+Shift+T (on Windows).

If you hit that combo once, it’ll bring up the last tab you closed. Hit it again, and it’ll bring up the one before that. And so on.

The menu options way

If you’re a bigger fan of right-clicking, just right click on the tab menu bar area, and select “Reopen Closed Tab”:

reopen-closed-tab
How to reopen closed tabs in Chrome.

If you do that again, it’ll open the tab you closed before that, and so on.

How to review your browser history in Chrome

What if you can’t remember exactly when you opened that tab you’re looking for? Or you can’t remember exactly what the site was called?

In that case, you might just want to check out your browsing history – the list of the last x number of sites you’ve visited/tabs you closed over the past days or weeks.

To do this, open your Chrome browser and click on the three little dots or green arrow in the upper right corner.

recently-closed-tabs-history
Click on “History” to see your recently closed tabs.

That’ll bring up the menu you see in the image above. The fourth option is “History” – hover or click on that and another menu will open to the left. This will list the tabs you’ve recently closed (the last 8-10 or so).

If you want to see your whole browsing history, you can click on the history tab at the top of the leftmost menu that popped up, like below:

click-on-history
Click on that second “History” tab to see your whole history.

And that will open up your browsing history, which will look something like this:

browser-history-total
Your browser history – scroll down to see more.

You can see the scroll bar on the right – if you scroll down, it’ll just keep loading more history. This lets you see where you’ve been on the internet.

How to reopen tabs in Safari

Similarly, in Safari there are a couple ways to reopen tabs you’ve closed.

The keyboard shortcut

The same keyboard shortcut we talked about for Chrome, above, works in Safari as well.

Just hit Command+Shift+T (Mac) or Ctrl+Shift+T (Windows) to open those tabs back up. Remember, you can do this multiple times to keep getting more closed tabs, in the order you closed them (from most-least recent).

The menu options way

Again, if you prefer using your mouse and menu bar, here’s how it works in Safari:

In the menu bar at the top of your screen (where it has options like “Safari, File, Edit, View, History” and so on), select “History”:

recently-closed-tabs-safari
How to view your recently closed tabs in Safari.

This will bring up a few options, as you can see above. I’ve hovered over “Recently Closed” (the first option) and it shows me my two recently closed tabs. If you use Safari as your browser you will likely see more tabs.

If you see the tab you just closed that you want to open back up, just click on it and it will open in a new tab/window.

You also have the option to “Reopen Last Closed Tab” (which also lists the keyboard shortcut next to it) and “Restore All Windows from Last Session”.

How to review your browser history in Safari

If you want to review your whole browser history, just click on that first option under the “History” menu (that says “Show All History”, see image above), and your entire history will appear:

safari-whole-history

Again, if you use Safari for your regular browser, your history will likely be longer 🙂

If you want to visit one of those sites directly, just double click on the listed URL and it’ll take you there in that same window.

How to reopen tabs in Firefox

If you’re a Firefox user, the process is fairly similar to what we discussed above.

The keyboard shortcut

You can open your recently closed tab(s) in Firefox the same way as in Chrome or Safari – with the Command+Shift+t (Mac) or Ctrl+Shift+t (Windows) keyboard shortcut. Easy peasy.

And if you hit those keys again and again, it’ll keep opening the tabs you closed in order from most recently closed to least recently closed.

The menu options way

To open your recently closed tabs in Firefox via menu options, just find the icon in the upper right corner that looks like books on a shelf:

Firefox-history-tab
Step 1 – find the “History” tab.

When you click that, you’ll get a dropdown menu that will have a “History” tab. Click on that, as highlighted in the image above.

This will bring up a new menu which will have a “Recently Closed Tabs” option, like you can see below:

open-recently-closed-tabs-firefox
Step 2 – find your recently closed tabs in Firefox.

If you click on that, another menu will open with all your recently closed tabs listed.

If you click on one of those tabs shown, Firefox will take you to that tab in a new window.

How to view your browser history in Firefox

Of course if you want to see all the browsing you’ve done, not just tabs you’ve recently closed, you can view your whole browser history.

Under that same little books-on-a-shelf looking icon in the upper right, again click on the “History” option. Then you’ll see your recent history, as well as an option to see all history:

Show-all-history-firefox
How to see recent history or show all history in Firefox.

If you need more than just your recent history (shown there in the dropdown menu) you can click on “Show All History” at the bottom and it’ll open up a separate window like this:

firefox-whole-history
How to see all your history on Firefox.

If you want to visit any of those pages, just double click on the URL/line and Firefox will take you there in the same window.

Now you can confidently reopen tabs in your browser so you don’t lose track of what you were working on or learning.

Best Business Laptop for Office and Personal use

Best Business Laptop for Office and Personal use


The best business laptops are great at multitasking, running several programs at once and are blazing fast. They get the job done without breaking a sweat. Whether it’s running dozens of tabs in the browser or keeping several Excel or Word documents open at the same time, business laptops help you work without running into hurdles. It’s not restricted to just fast performance, either, since these laptops are also expected to last long hours on battery.


Some of the things that you need to consider while buying a business laptop include the display, processor and storage. Additionally, you should also consider the weight as a lightweight option is easier to carry around.


1. Lenovo IdeaPad S540

The Lenovo IdeaPad S540 is a sleek laptop that is powered by the latest 10th gen Intel Core i5 processor. It has a 13.3-inch Quad HD resolution display, which means it is a highly pixel dense display and the details on the screen should be immaculate. It has 8GB of RAM, 512GB SSD and the battery life is rated at 18.5 hours. Its sleek design, latest hardware and long battery life make it a great business laptop.


2. Asus ZenBook Duo UX481FL-BM5811T

The Asus ZenBook Duo is a unique laptop that features a 14-inch Full HD anti-glare LED display and a 12.6-inch ScreenPad Plus touch display. It is powered by a 10th gen Intel Core i5 processor coupled with MX250 graphics, 8GB RAM and a 512GB SSD. It comes with Windows 10 preinstalled, features a full sized keyboard and comes with a precision touchpad with multi-gesture support. It has cleared the MIL-STD-810G military standard and offers a durable build that can withstand extreme temperatures and humidity.


3. Mi Notebook Horizon Edition 14 XMA1904-AF

The Mi Notebook Horizon Edition 14 XMA1904-AF features a 14-inch Full HD anti-glare display with a 91% screen-to-body ratio. It is powered by a 10th gen Intel Core i7 processor with MX350 graphics, 8GB DDR4 RAM and a 512GB SSD. It comes with Windows 10 preinstalled and offers a battery life of up to 10 hours on a single charge. It comes with a scissor-switch keyboard and is equipped with stereo speakers with DTS Audio processing support.

4. LG Gram 14Z90N

The LG Gram 14Z90N is a sleek and lightweight alternative that sports a 14-inch Full HD display. It is powered by the 10th gen Intel Core i5 processor and has 8GB RAM and 256GB SSD. Its battery life is rated at a whopping 23.5 hours thanks to the 72Wh battery it comes with. It comes with Windows 10 preinstalled. It is a lightweight yet powerful laptop that comes with a really long battery life, making it perfect for business needs.


5. HP Pavilion x360

The HP Pavilion x360 is a convertible laptop that has a 14-inch touchscreen display. It is powered by the 10th generation Intel Core i5 processor which is paired with 8GB of RAM and 512GB of M.2 NVMe M.2 SSD for a smooth experience. It also has a fingerprint reader for quick and secure unlocking experience. It can be your perfect companion whether you want to get work done, be a little creative, or just sit back and relax by watching a movie.


6. Apple MacBook Pro

The Apple MacBook Pro is one of the best laptops out there for a range of use cases, including business purposes. It is powered by the 9th gen Intel Core i7 processor and has a 16-inch Retina display. It also comes with the new Touch Bar and Touch ID features. In terms of memory it has 16GB of RAM and 1TB SSD so you’re never short of space. It is one of the best laptops out there when it comes to speed, portability and performance.


7. Acer Swift 5 SF514-54T

The Acer Swift 5 SF514-54T features a 14-inch Full HD IPS display with Cine Crystal technology. It is powered by a 10th gen Core i7 processor coupled with Intel Iris Plus Graphics, 16GB DDR4X RAM and a 512GB SSD. It comes with Windows 10 preinstalled and comes with one USB 3.1 port, one USB 2.0 port and one USB Type-C port. It is powered by a 56 Wh battery that offers up to 12 hours of use on a single charge.

Best Laptop for Home Office

 These days, a Home Office is crucial for almost all professions. Here, we’ll look at the best laptops for Home Office Use. As mentioned, both professionals and non professionals, require a laptop, that can easily be used in a Home Office. In addition to good performance, you should also get a laptop with a quality display, good battery life and good build quality.

Criteria used for best laptop recommendations suitable for a Home Office: Firstly, the laptop you buy, must have good performance. This, is in order to be able to run programs and apps without having lags and slowdowns. In most cases, you’ll be running several apps at the same time. Maybe, have several web browser tabs, PDF file, word documents and excel, all open at the same time. For this reason, you need at least 4GB of RAM. With this, you can run several apps at the same time, and intuitively switch between these.

Secondly, getting the right display quality and size, goes a long way in ensuring that you are productive as possible in your home office. Ideally. A 15 inch screen is suitable for most people. If you wont be constantly on the move with your laptop from the home office, then 17 inches might be best suited for you. No matter the display size, the minimum resolution you should get is 1080 x 1920 pixels. You get high visual fidelity, contrast ratio and color accuracy.

All the laptops listed here, come with good build quality. Most, are made of aluminum with only a few being made of plastic.

Though battery life is not very crucial, for a home office, you might find it convenient to have a laptop that can last at least 6 hours without a charge. All of the laptops listed here, meet the set criteria, and are therefore suitable for Home Office Use. You can find brands such as Apple MacBook, Microsoft Surface, Samsung, Acer, Asus, Razer, HP, Lenovo, Dell and many more.


1. Acer Aspire 3

CPU Intel Core i5-1035G1 Quad Core Processor
GPU Intel Graphics
Display Size 15.6 inches
Display Resolution 1920 x 1080 pixels
RAM 8GB
Storage Space 256GB SSD
Operating System Windows 10
Ports 2 USB 2.0, 1 USB 3.1 Gen 1 Type A / 1 HDMI / Headphone-out/microphone-in combo jack Micro / SD media card reader
Dimensions (L x W x H) 14.3 x 9.7 x 0.78 inches
Weight 1 pounds
Pros Lightweight, Good performance, Quality Display
Cons NA


2. Acer Swift 3 SF314-42-R7LH Laptop

CPU AMD Ryzen 5 4500U Hexa-Core
GPU Radeon Graphics
Display Size 14 inches
Display Resolution 1920 x 1080 pixels
RAM 8GB
Storage Space 256GB PCIe NVMe SSD
Operating System Windows 10
Ports 1 – USB Type-C port USB 3.2 Gen 2 (up to 10 Gbps) DisplayPort over USB Type-C & USB Charging, 1- USB 3.2 Gen 1 port (featuring power-off charging), 1 – USB 2.0 port & 1 – HDMI port
Dimensions (L x W x H) 12.73 x 8.62 x 0.63 inches
Weight 2.65 pounds
Pros Good performance, Display Quality
Cons NA


3. OMEN 15-en0029nr Laptop

CPU Ryzen 7 4800H Processor
GPU NVIDIA GTX 1660 Ti 6GB GDDR6 (VR Ready) Dedicated Graphics
Display Size 15.6 inches
Display Resolution 1920 x 1080 pixels
RAM 16GB RAM
Storage Space 512GB SSD Storage
Operating System Windows 10
Ports USB, HDMI, Ethernet
Dimensions (L x W x H) 20 x 12 x 3 inches
Weight 5 Pounds
Pros Performance, Display Quality
Cons NA


4. Apple MacBook Pro M1 13-inch, 8GB RAM, 256GB SSD


CPU Apple M1 chip; 8-core CPU with 4 performance cores and 4 efficiency cores; 16-core Neural Engine
GPU M1 8-core GPU
Display Size 13.3-inch (diagonal) LED-backlit display with IPS technology
Display Resolution 2560-by-1600 native resolution at 227 pixels per inch
RAM 8GB RAM
Storage Space 256GB
Operating System MacOS
Ports Two Thunderbolt / USB 4 ports with support for: Charging, DisplayPort Thunderbolt 3 (up to 40 Gbps), USB 3.1 Gen 2 (up to 10 Gbps)
Dimensions (L x W x H) 13.41 x 11.97 x 0.61 inches
Weight 3 Pounds
Pros Performance, Battery Life
Cons NA


5. Gigabyte AERO 17 Laptop i7- 32GB RAM


CPU Intel Core i7-10870H Octa Core
GPU NVIDIA RTX 3060 6GB GDDR6
Display Size 17.3 inches
Display Resolution 1920 x 1080 pixels
RAM 32GB
Storage Space 1TB SSD
Operating System Windows 10 Pro
Ports 3 USB 3.2 Gen1, 1 HDMI, 1 mini Display Port, Thunderbolt 3 (Type-C), SD Reader, 1 x Microphone Jack, 1 x Headphone Jack
Dimensions (L x W x H) 10.6 x 15.6 x 0.84 inches
Weight 5.5 pounds
Pros Performance, Display Quality
Cons Weight

Best Laptop for Film Editing

Best Laptop for Film Editing

Film editing, requires a laptop that is powerful enough to handle all the plugins, special effects and transitions. Here, we’ll look at the best laptops for Film Editing. Many programs exist that are commonly used for file editing. These include Adobe Premier Pro, Davinci Resolve, Vegas, just to name a few.

You need a laptop that can easily handle all these programs without having performance issues. Several factors have been taken into consideration when coming up with this list of best laptops for Film makers. Thee are performance, screen quality and size, battery life in addition to design and build quality.

First, lets talk about performance. All these editing software, are heavy on performance, especially if using several plugins and special effects. You don’t want to be in a situation where you get long hours of rendering time, in addition to unresponsiveness when editing. This is where an Intel Core i7/ Ryzen 7 comes in play. That is the minimum laptop processor listed here. With that, you are guaranteed good performance when using video editing programs.

The RAM, is an equally important specification for video editing laptops. With the right amount, you get performance boost, especially when handling large and complex films. Here, you’ll only get a minimum of 8GB RAM. This ensures that you can load video clips into your program faster and smoothly.

In recent time, a dedicated graphics card (GPU) has become increasingly important. A graphics card, either from Nvidia or AMD, helps in lightening the workload from the CPU. It reduces the rendering times, as more video editing programs start to use the GPU.

These days, an SSD has become crucial, in almost all laptops. It allows for faster opening of film editing programs, faster load times for video clips to the timeline in addition to some improvement in rendering times. Most people, have a mix of both SSD and HDD. This gives two advantages, speed and raw storage capacity.

The display quality, and size, is one of the most important features that film makers should take into consideration when buying a laptop. Speaking of the size, anywhere from 14 to 17 inches, is suitable for most people. However, this is highly subjective, so it will depend on your preference. The display quality, is however not negotiable.

You don’t want to be in a situation where the film you’ve edited looks different on most tvs and even in theaters. This is where color accuracy comes in play. The laptops listed here, have a high percentage of color accuracy, in addition to having high contrast ratio. When it comes to resolution, 1920 x 1080 is the minimum resolution.

Other important factors taken into consideration include battery life and build quality. All the laptops listed here, meet the minimum specifications, and re therefore suitable for film editing. You can find brand such as Microsoft Surface, Asus, Dell, HP, Lenovo, Acer, MacBook, MSI, Gigabyte in addition to Razor Blade.


1. Gigabyte AERO 17 Laptop i9


CPU Intel Core i9-10980HK
GPU GeForce RTX 2080 Super MAX-Q
Display Size 17.3 inches
Display Resolution 1920 x 1080 pixels
RAM 16GB
Storage Space 1TB SSD
Operating System Windows 10
Ports USB, Ethernet, Audio Out
Dimensions (L x W x H) 15.6 x 10.6 x 0.84 inches
Weight 5.5 pounds
Pros Performance, Display
Cons


2. Acer Predator Triton 500 PT515-52-77P


CPU 10th Generation Intel Core i7-10750H 6-Core Processor
GPU NVIDIA GeForce RTX 2080 SUPER Graphics with Max-Q
Display Size 15.6 inches
Display Resolution 1920 x 1080 pixels
RAM 32GB
Storage Space 1TB SSD
Operating System Windows 10
Ports 1 – Thunderbolt 3 (Full USB 3.1 Type C) Port, 3 – USB 3.2 Gen 2 Ports (One with Power-off Charging), 1 – HDMI 2.0 Port with HDCP Support, 1 – Mini Display Port
Dimensions (L x W x H) 14.11 x 10.04 x 0.7 inches
Weight 10.52 pounds
Pros Performance, Display Quality
Cons Weight


3. Dell G7 15.6 4K OLED Laptop


CPU Intel Core i7-10750H
GPU NVIDIA GEFORCE RTX 2070MQ
Display Size 15.6 inches
Display Resolution 4K Ultra HD (3840 x 2160) OLED
RAM 16 GB DDR4
Storage Space 1TB M.2 PCIe NVMe Solid State Drive
Operating System Windows 10
Ports Standard SD card Slot, 2x USB 3.2, USB 3.2 Gen 1 with PowerShare, Thunderbolt 3 USB 3.2 Gen 2 Type-C, Mini Display Port, HDMI 2.0, RJ-45, Headset jack
Dimensions (L x W x H) 14.1 x 10.5 x 0.72 inches
Weight 3.7 pounds
Pros Good performance, Quality Display
Cons None


4. Omen 15t Laptop Intel i9

CPU Intel i9-10885H
GPU NVIDIA GeForce RTX 2080 Super Max-Q 8GB GDDR6
Display Size 15.6 inches
Display Resolution 4K AMOLED (3840×2160)
RAM 32GB DDR4
Storage Space 512GB NVMe Solid State Drive + 1TB Hard Disk Drive
Operating System Windows 10
Ports USB, Ethernet, HDMI, Audio
Dimensions (L x W x H) 14.17 x 10.35 x 0.79 inches
Weight 5.28 pounds
Pros Performance, Design, Display Quality
Cons None


5. MSI GE76 Raider 10UG-232 Laptop-i7-RTX3070

CPU Intel Core i7-10870H 2.2-5.0 GHz
GPU NVIDIA GeForce RTX3070 8GB GDDR6
Display Size 17. 3 inches
Display Resolution 1920 x 1080 pixels
RAM 32GB (16G*2) DDR4 3200MHz
Storage Space 1TB NVMe SSD
Operating System Windows 10
Ports Killer LAN E3100 | Intel Wi-Fi 6E AX210(2*2) | BT 5.2
Dimensions (L x W x H) 1.08 x 15.63 x 10.57 inches
Weight 6.39 pounds
Pros Performance, Display Quality
Cons Quite Heavy

5 Methods: How to Check Your Self Jio Number?

5 Methods: How to Check Your Self Jio Number?

 There are times when you might just get a brand new Jio number to call or use. However, in the initial days, it might be difficult to remember the Jio number, and you will take some time to memorise it completely. However, during this gap, one might be thinking about how they can remember newly-bought Jio numbers. 

Moreover, are there any options to check the Jio number using some codes or other methods? Well, there are five different ways you can find your number. In this guide, we will be talking about these methods in depth. So, without further ado, let’s get started. 

Jio Number Check via USSD Code 

Jio customers can also get all the details of their Jio number by using the USSD code. Here’s how you can do it: 

Step 1: Open the Phone or Dialer application on your smartphone. 

Step 2: Now dial *1# for SIM 1 or *2# for SIM 2. 

Step 3: You will get a pop-up or an SMS showing your Jio number. 

If the above-mentioned method doesn’t work, you can also dial 1299 from your registered Jio mobile number to get an SMS denoting your Jio number along with other details like validity, plan details, and more. 

Jio Number Check via SMS 

Although there is no specific code to check your Jio number, the telecom company gives you the option to know all your plans, validity, and more through an SMS code. Interestingly, the SMS also shows your Jio number. Here’s how it works: 

Step 1: Open the Message application on your Android or iOS device. 

Step 2: Send the SMS to 199 and type MYPLAN. 

Step 3: Hit the Send button, and you will shortly receive an SMS showing your Jio number and plan details like validity, data, account balance, and more.  

Jio Number Check via MyJio App

The most convenient way to check our Jio number is by downloading the MyJio application. The app is available for download from Google Play and Apple App Store. Here’s what you need to do: 

Step 1: Download and install the MyJio application on your Android or iOS device. 

Step 2: Open the application and tap on Sign in with SIM. 

Step 3: Your Jio number will appear at the top of the screen. 

Jio Number Check via Customer Care Support 

Another way to check Jio’s number is by calling customer care support. This offline method will allow you to find your mobile number along with other details like your data plan, account balance, and more. Here’s how you can know your Jio number from customer care support. 

Step 1: Open your Phone or Dialer application on your mobile. 

Step 2: Dial 1800 899 999 or 199 from your registered Jio mobile number 

Step 3: You will reach the Interactive Voice Response (IVR) service. Select the preferred language from the menu. 

Step 4: The IVR will tell you about your current data balance and plan validity. 

Step 5: Press the corresponding key to talk to a customer care representative. 

Step 6: Ask for your mobile number from the representative, and he/she will be happy to assist you. 

Step 7: The best thing you can do is write down the mobile number so that you can easily use it in the future. 

Jio Number Check by Calling Another Mobile

The final option to check your Jio number is to call a friend or family member. If you have a friend or family member nearby, simply call them from your Jio number. They will see your mobile number, and you will automatically know your Jio number. 

How to Send WhatsApp Messages Without Saving Number?

How to Send WhatsApp Messages Without Saving Number?


WhatsApp has replaced the standard Message application to become a default texting application for most smartphone users across the globe. The app offers a seamless experience for sending or receiving text messages, videos, photos, or documents.

 However, there are times when you want to send a WhatsApp message to someone without going through the hassle of saving their number in the contacts. But you can only send WhatsApp messages to those numbers saved in your contact list. What if we told you that you can send WhatsApp messages without saving someone’s number on your phone? In this article, we have listed five effective ways to do so. So, without further ado, let’s get started. 

Method 1: Send Messages without Saving Number via WhatsApp Application One of the easiest ways to send a WhatsApp message to an unknown number is to use this method. 

Step 1: Open the WhatsApp application on your Android or iOS device. 

Step 2: Copy the mobile number to which you want to send a WhatsApp message. 

Step 3: Tap the New Chat button at the bottom and tap your name under WhatsApp Contacts. 

Step 4: Paste the mobile number in the text box and click Send. 

Step 5: Now tap on the mobile number; if the person is on WhatsApp, you will see the Chat with option. 

Step 6: Tap on it, and you can send a WhatsApp message to the number without saving it.

Method 2: Send WhatsApp Messages without Saving Number by Creating a Link on BrowserThis is also an effective way to send a WhatsApp message without needing to save the number. All you need to do is follow these steps: 

Step 1: Open the browser on your mobile or desktop. 

Step 2: Copy and paste this link https://api.whatsapp.com/send?phone=xxxxxxxxxx in the address bar. 

Step 3: Replace xxxxxxxxxx with the mobile number you want to send a WhatsApp message. Make sure to add the country code before the mobile number. For example, if the number is 9876543210, the link should be http://wa.me/919876543210. 

Step 4: Now tap enter to open the link and tap on the Continue to Chat option. 

Step 5: You will be redirected to the person’s WhatsApp chat and can easily send a message without saving the number. 

Method 3: Send WhatsApp Messages without Saving Number via the Truecaller AppTruecaller has a dedicated WhatsApp button to send a message easily without saving the number. Here’s how you can do it: 

Step 1: Open the Truecaller application on your Android or iOS device. 

Step 2: Search for the mobile number on the application and scroll down to see the WhatsApp icon. 

Step 3: Tap on it, and the app will open a WhatsApp chat window, allowing you to text the person without saving the contact. 

Method 4: Send WhatsApp Messages without Saving Number via Google AssistantYou can also use Google Assistant to send a WhatsApp message to an unknown number. Here’s how you can do it: 

Step 1: Activate Google Assistant on your smartphone. 

Step 2: Ask the Google Assistant the phrase “send a WhatsApp to ” followed by the mobile number. It is important to note that you must say the exact mobile number and country code. 

Step 3: For example, if the number is 9876543210, the phrase should be “send a WhatsApp to +919876543210”. 

Step 4: The assistant will ask for the text you want to send to the mobile number. Simply dictate the text. 

Step 5: Once done, Google Assistant will automatically send the WhatsApp message to the desired mobile number. 

Method 5: Send WhatsApp Messages without Saving Number via Apple Siri ShortcutIf you own an iPhone, then this method is for you. One can use the Siri Shortcuts to send WhatsApp messages to an unsaved mobile number. Here’s how you can do it: 

Step 1: Open the Siri Shortcuts application on your iPhone. 

Step 2: Go to Settings > Shortcuts and enable Allow Untrusted Shortcuts. 

Step 3: Now download the WhatsApp to Non-Contact shortcut by searching on the browser. You can also [click on this link](https://www.icloud.com/shortcuts/be22fa0abe644c86baa126ffff2ae3eb). 

Step 4: Click on the Get Shortcut button and download it. 

Step 5: Tap on Add Untrusted Shortcut. 

Step 6: Now, open the Shortcuts app and scroll down to WhatsApp to the Non-Contact shortcut. Tap on it to run the shortcut. Alternatively, you can tap on the three dots to add to the Home screen. 

Step 7: Now, just enter the mobile number, and you will be redirected to Whatsapp’s new chat window.

How to Delete Google Pay Transaction History?


How to Delete Google Pay Transaction History?

Google Pay is a popular payment solution in India that caters to millions of people. The UPI-based payment system provides contactless payments effortlessly. However, it also comes with a cost of privacy. Google Pay stores your transaction history. 

That said, the company also gives you an option to delete your Google Pay transactions history without much hassle. This guide lists different methods to easily delete your Google Pay transaction history using the Google Pay application or your laptop. So, without further ado, let’s get started.

How to Delete Google Pay Transaction History

Google allows you to delete any transaction history on its Google Pay application. Check out these two different methods:

Delete Google Pay Transaction History via Mobile App

One can easily delete Google Pay transaction history from the mobile application. 

Step 1: Open the Google Pay application on your smartphone and tap on the Profile section.

Step 2: Scroll down, tap Settings, and then go to the Privacy & Security option.

Step 3: Tap on the Data & Personalization option and click the Google Account link that will take you to the Google Accounts page.

Step 4: Now, go to Payments & Subscriptions > Payment Info and tap on Manage Experience.

Step 5: Under Payments Transactions & Activity, you will find the list of Google Pay transactions.

Step 6: You can delete individual Google Pay transaction history by tapping the cross button next to the transaction.

Step 7: One can also delete the transaction history in bulk. Just above the transaction, you will find the Delete option.

Step 8: Select the desired time frame, and the data will be deleted from your Google Pay application.

Delete Google Pay Transaction History via Desktop

Google also gives you an option to delete your Google Pay transaction history from your desktop. Here’s how you can do it:

Step 1: Go to https://myaccount.google.com/ and click the Payments & Subscriptions option.

Step 2: Scroll down to find Payment Info and click the Payments Transactions & Activity option.

Step 3: You will find a list of Google Pay transactions. You either individually delete each transaction.

Step 4: One can also delete the transaction history in bulk by clicking the Delete option and selecting the time frame.

How to Export Your Google Pay Account Data?

Google also provides an option to easily export your Google Pay account data for your future use. This option is also viable for those who want to keep a backup before deleting the Google Pay transaction history. Here’s how you can do it:

Step 1: Go to your mobile or desktop browser and visit https://myaccount.google.com/.

Step 2: Under the Data & Privacy section, click ‘Download Your Data’.

Step 3: Now, select Google Pay from the list and tap on Next Step.

Step 4: Select the Transfer to option, Export Frequency, file type, and file size according to your preference and tap on Create Export.

Step 5: You can export all your Google Pay data from your account.

How to Permanently Delete a Google Pay Account?

You can permanently delete a Google Pay account if it is no longer required. Just follow these simple steps to do so.

Step 1: Go to https://myaccount.google.com/ from your mobile or desktop browser.

Step 2: Go to Data & Privacy and then scroll down to Delete a Google Service.

Step 3: You will see a list of services. Search for Google Pay service and click on the dustbin icon right next to it.

Step 4: You will get a warning message. Follow the on-screen instructions, and your Google Pay account will be deleted permanently.