PowerPoint offers the ability to add header and footers to the slides. While having footers in presentations is logical, header may not be quite evident at first. Typically, the slide title would be the header in the main slide, however when it comes to printing out handouts a separate header would be quite useful.
Here are the steps to add header and footer information to slides
Step 1 − In the Insert ribbon, click on the Header & Footer menu item.
 |
| MS PowerPoint – Adding Header & Footer |
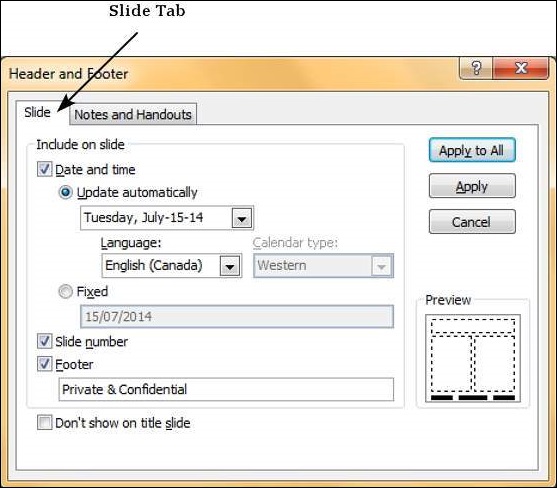
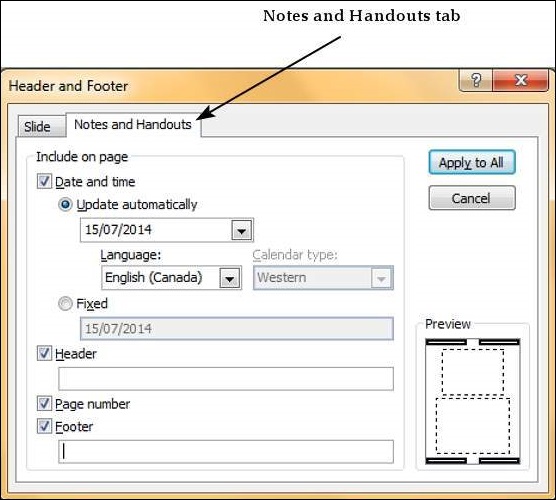
Step 2 − The Header and Footer dialog has two tabs — the Slide tab and the Notes and Handouts tab.
Step 3 − You can add details to the slide footer from the Slide tab.
 |
| MS PowerPoint – Adding Header & Footer |
| S.No | Slide Footer Options & Description |
|---|---|
| 1 |
Date and time
|
| 2 |
Slide Number Insert Slide number in the footer |
| 3 |
Footer Add designated text to the footer – a good example of this is the confidentiality clause or copyright clause |
| 4 |
Don’t show on title slide Decide on whether the footer information should be displayed on the title slide or not |
Step 4 − You can add the details to the handouts from the Notes and Handouts tab.
 |
| MS PowerPoint – Adding Header & Footer |
| S.No | Notes and Handouts Options & Description |
|---|---|
| 1 |
Date and time
|
| 2 |
Header Add the header information for every page on the handout |
| 3 |
Page Number Insert page number in the footer |
| 4 |
Footer Add designated text to the footer – a good example of this is the confidentiality clause or copyright clause |
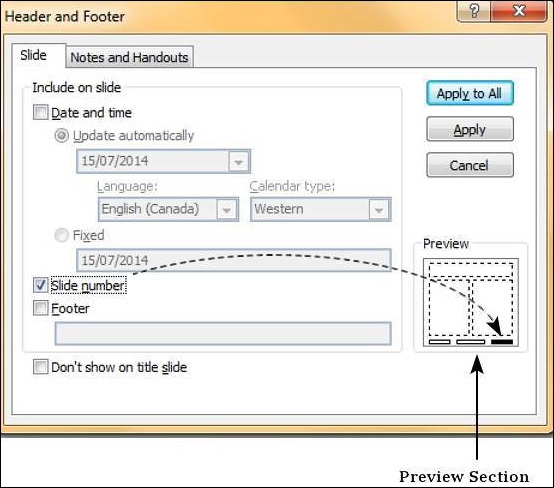
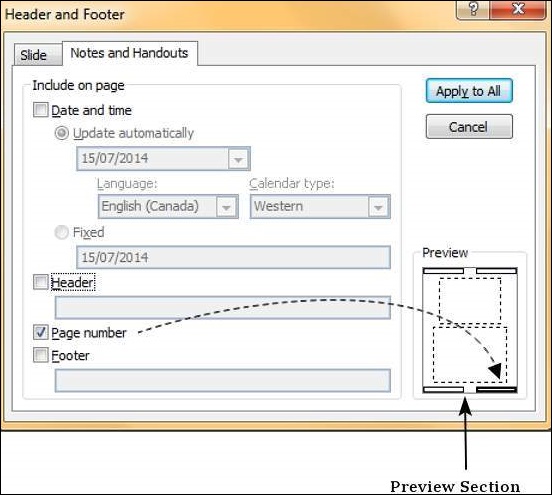
When you check any of the header and footer checkboxes in either tabs, you can see the location where the detail is inserted in the preview section.
 |
| MS PowerPoint – Adding Header & Footer |
 |
| MS PowerPoint – Adding Header & Footer |


